In the StaffingGo application, We do have a Form-16 Generation & Form -16 Upload functionality.
Instead of generating the Form-16 from the portal, We do have another option to download from income tax portal -Traces in the Part-A & Part -B format includes with PAN number identification. Generate the Form-16 documents from the Traces portal and same can able to upload in the StaffingGo application using Document upload tool.
Before uploading Form 16 documents, download and install the Document Upload Tool using the link provided below.
Login the Tool with using StaffingGo core application login credentials.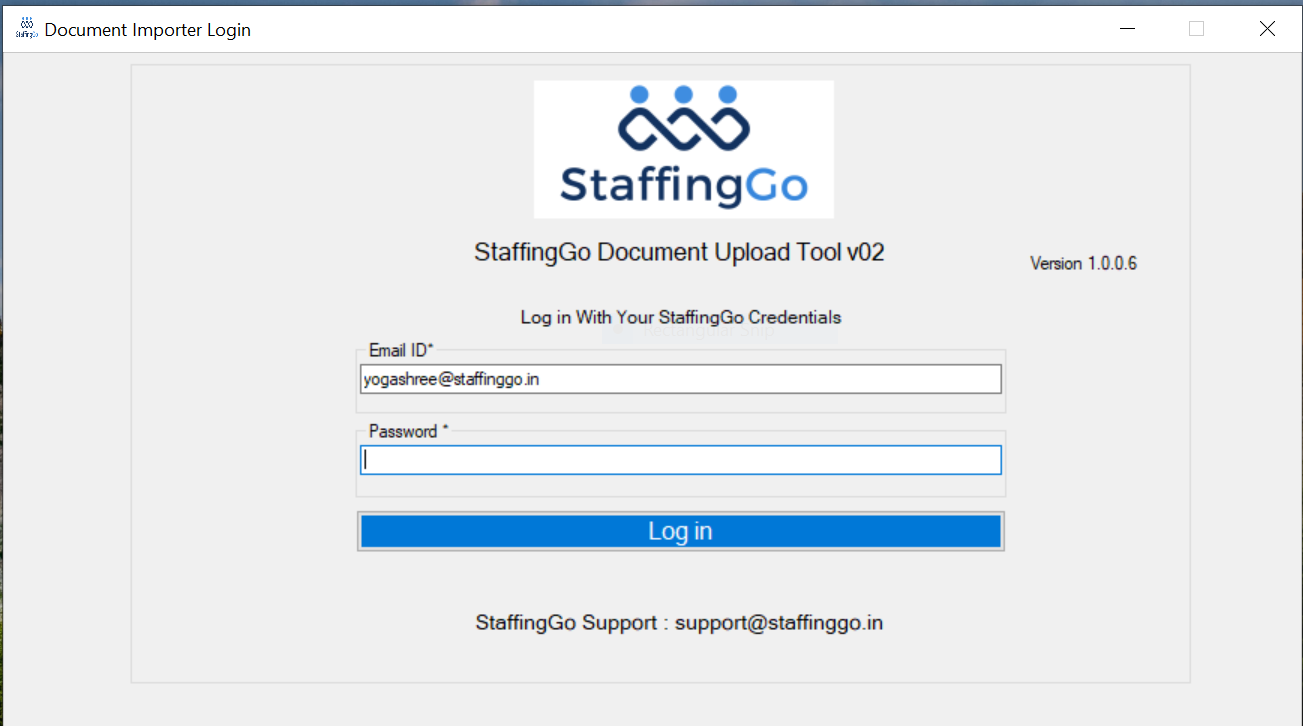
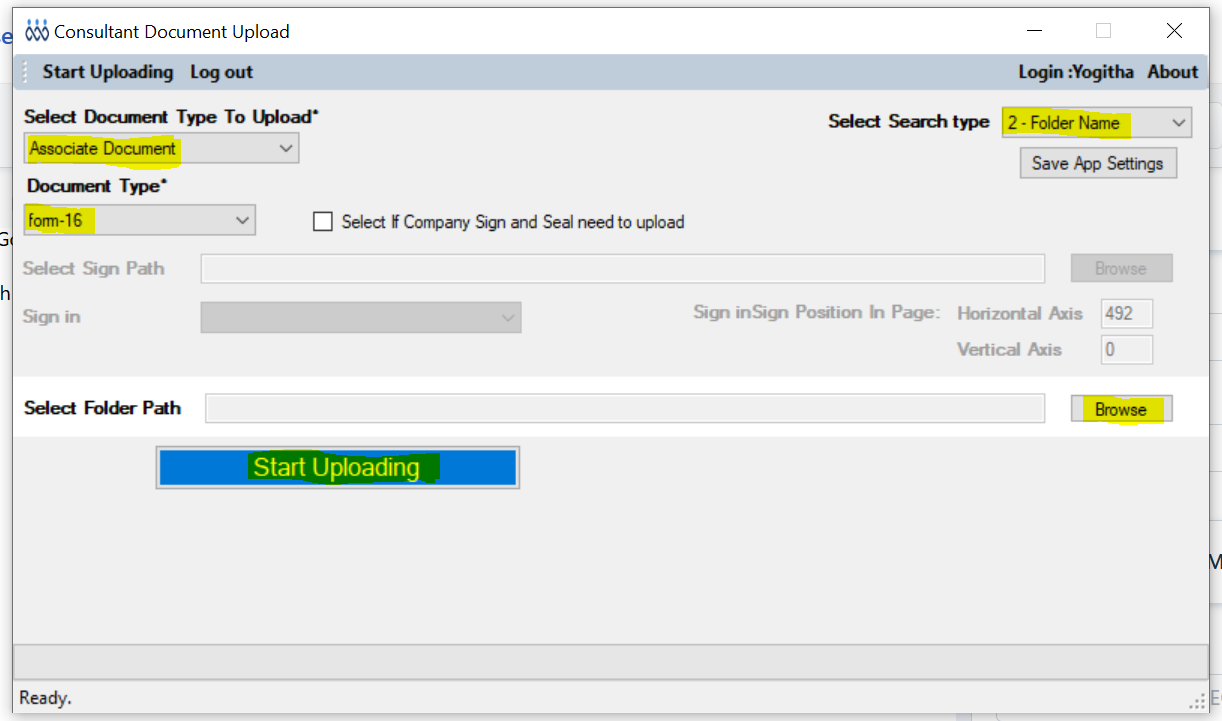
Once it is login Page will navigate to choose to few details which are indicating that uploaded file location store in the Staffinggo application.
- Select Document Type of Upload : Choose as Associate Document.
- Document Type : Choose the drop-down as Form-16 documents type ( Form-16 documents need to create under General Master >> Documents List )
- Select Search type as Folder Name - All employee Form-16 documents need to store in one folder with Name as Form-16 ( Same as document Type Name)
- After choosing all option click on Browse option and choose the stored Form-16 folder name( Part -A & Part- B maintain separate folder and twice with different folder need to upload)
- Click on start Uploading option to upload in the Staffinggo application.
4. Once documents uploaded will get successful valid message.
5. All uploaded documents are available under each employee HR details >> Statutory documents list option. Same Form-16 documents are available in the Employee portal for reference.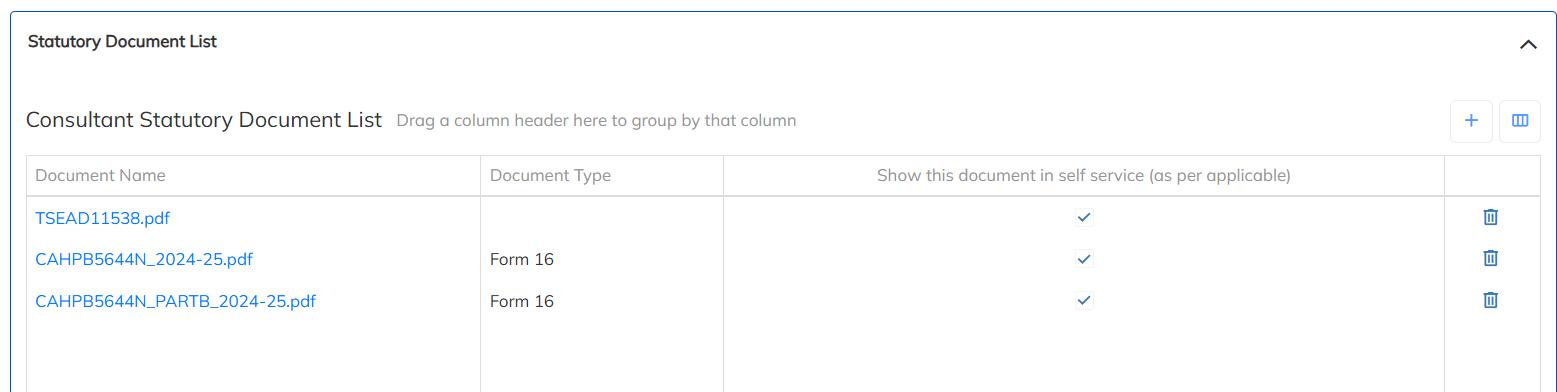
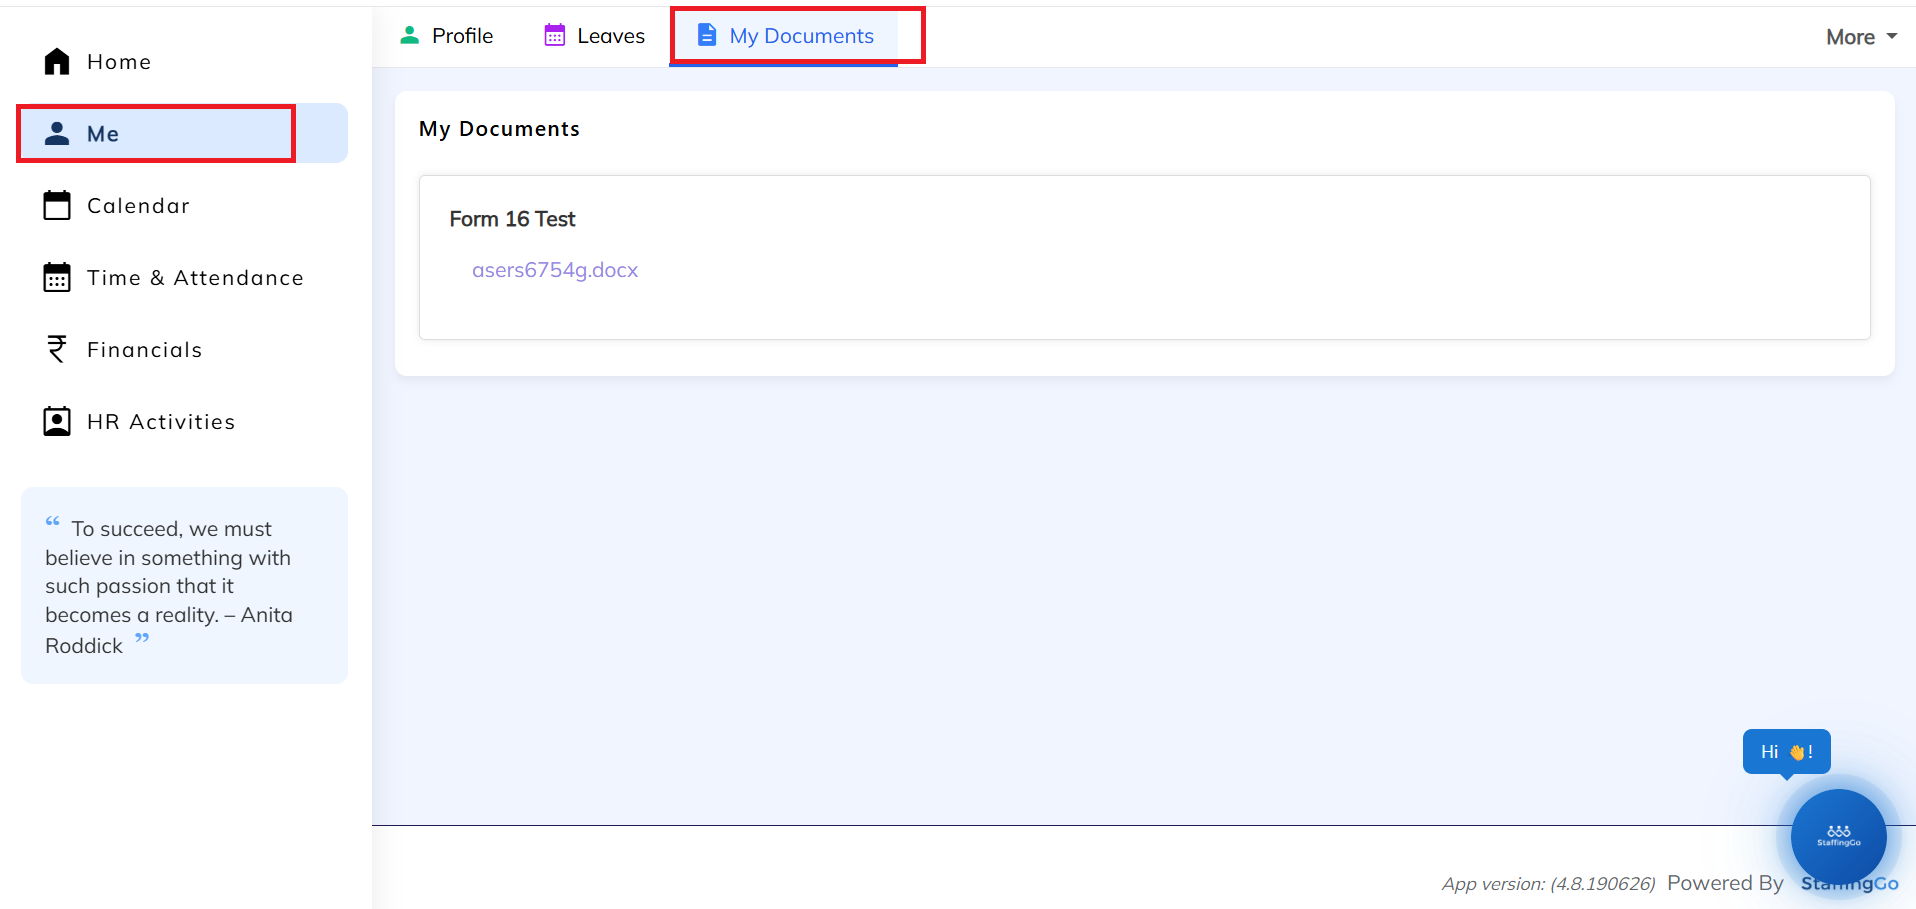
- To View Form 16 in the Employee Portal:
Log in to the Employee Portal and navigate to the Me section. Under Me, click on My Documents to view the uploaded Form 16 documents.
Steps to Configure Form 16:
Navigate to Settings → Document List.
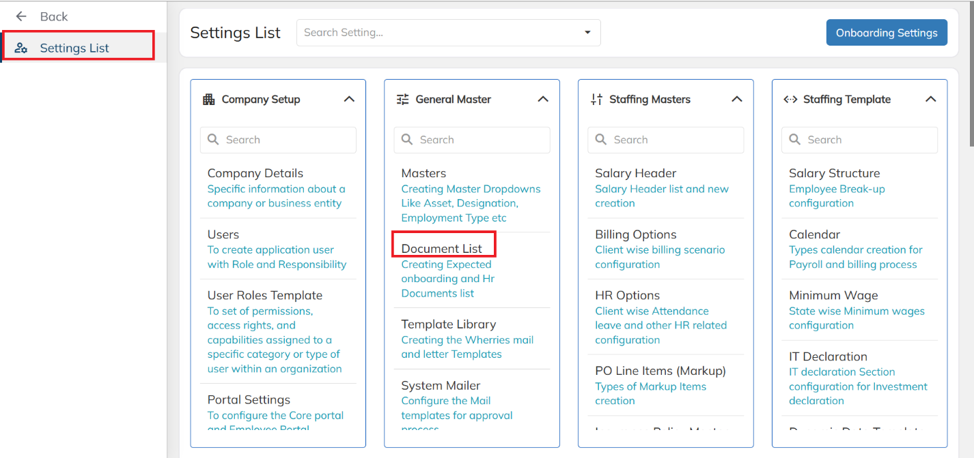
- Prepare the Document List and click on Save.
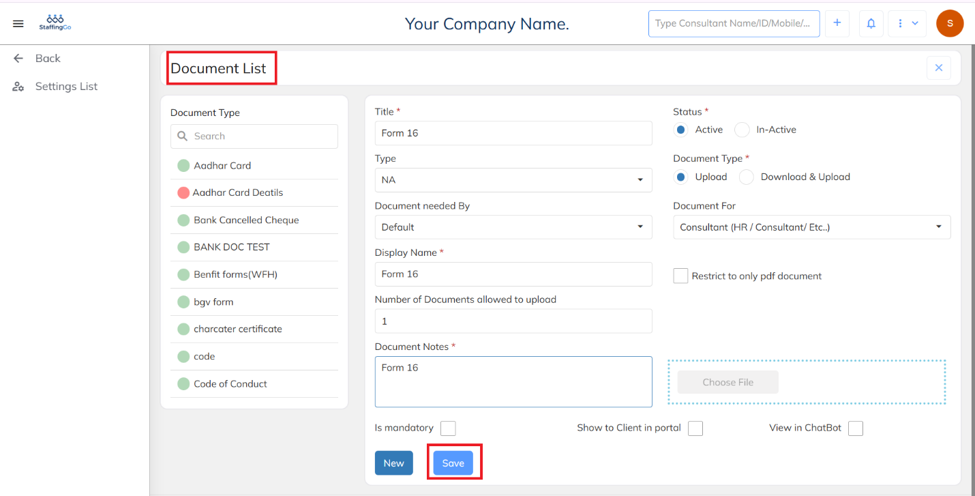
Title: Enter Form 16 as the document title.
Type: Select Not Applicable (NA) from the Document Type dropdown.
Document Needed By: Choose Default.
Display Name: Enter the name that should be displayed to users while accessing the document.
Number of Documents Allowed to Upload: Specify the maximum number of documents users are permitted to upload.
Document Notes: Enter any additional instructions or notes related to the document, if required.
Status: Set the status to Active.
Document Type: Select Upload as the document type.
Document For: Choose Consultants/Employees based on the intended audience.
Restrict to Only PDF Document: Enable this option if uploads should be restricted to PDF files only.
Is Mandatory: Enable this option if submission of the document is compulsory.
Show to Client in Portal: Enable this option to make the document visible to clients in the portal.
View in Chatbot: Enable this option if the document should be accessible through the chatbot.
Upload Form 16:
There are two ways to upload form16, Manual way & Bulk way:
- Manual way:
Navigate to the Consultant section and select the employee for whom you want to upload the Form 16 document. Click on HR details.
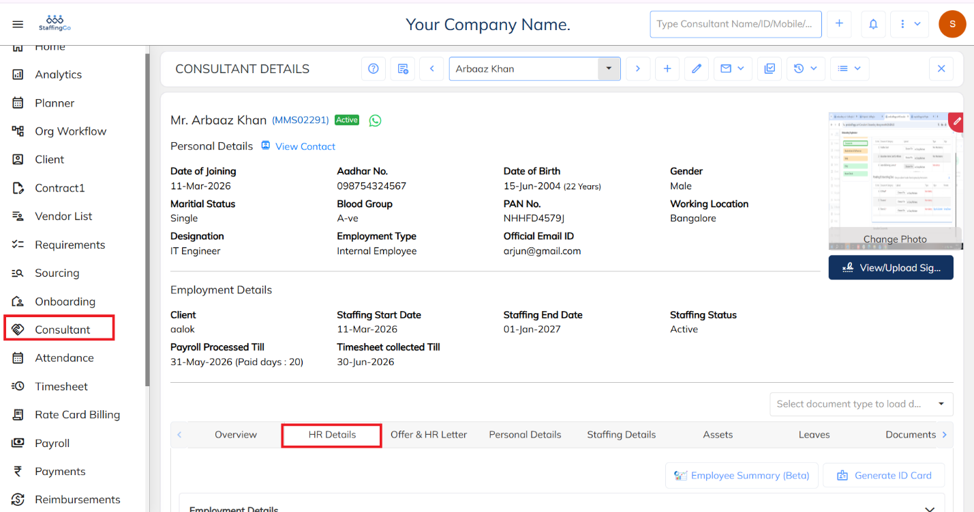
Under HR Details, navigate to the Statutory Document List section.
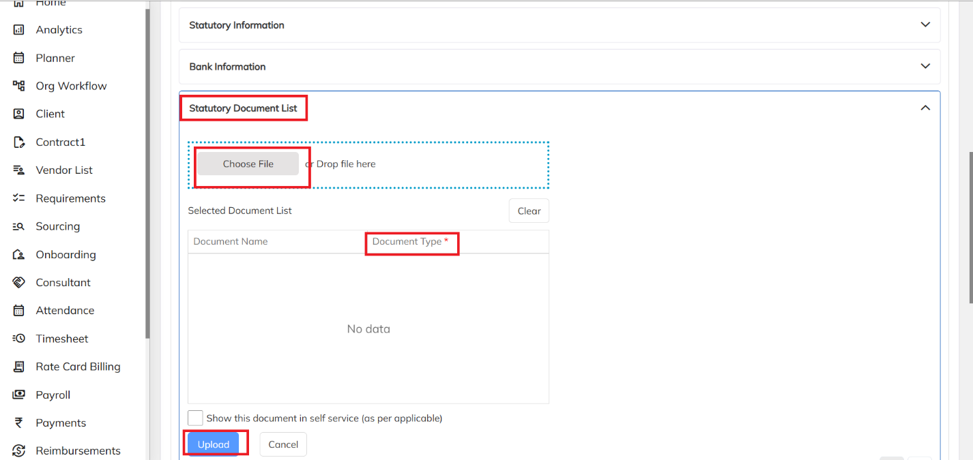
- Click the Add icon.
- Browse and select the file you want to upload.
- Choose the appropriate Document Type from the dropdown (for example, the Form 16 document type created in the Document List).
- Enable the Show in Self Service option if you want the document to be visible to the employee in the Self-Service portal.
- Click Upload to complete the document upload process.
Bulk Way:
Before uploading Form 16 documents in bulk, create a new document in the Document List by following the steps outlined above.
- Create a new folder on your desktop.
- Copy all the Form 16 documents that need to be uploaded into this folder.
- Ensure that the folder name exactly matches the Document Name that was created in the Document List configuration.
- After placing all the required documents in the folder, open the Document Upload Tool that was previously installed on your system.
Once the new folder containing all the Form 16 documents is ready, refer to the steps provided below the tool to complete the document upload process.
Please refer to the link below to download the Document Upload Tool.
https://dms.staffinggo.in/index.php/s/NLp2TG9gq5XLfgG
Please refer to the video link below to view the complete end-to-end Form 16 process.
https://dms.staffinggo.in/index.php/s/39seACX7D2N3Jgz
Please refer to the link provided below for detailed instructions on how to download Form 16 documents.
Note- After downloading the Document Upload Tool using the link provided, refer to the video below to complete the installation process. The video also demonstrates the complete end-to-end process and can be used as a reference guide for configuring and using the tool.
Note-Ensure that all Form 16 documents are named and saved using the respective employee's PAN Number before proceeding with the upload process.
Was this article helpful?
That’s Great!
Thank you for your feedback
Sorry! We couldn't be helpful
Thank you for your feedback
Feedback sent
We appreciate your effort and will try to fix the article