The Asset Management System (AMS) helps teams efficiently track and manage all company assets — including recoverable laptops, desktops, monitors, peripherals, software licenses, and ID cards and non recoverable -Uniforms, Shoes.
It ensures complete visibility of the asset lifecycle, covering procurement, assignment, maintenance, recovery, and disposal processes.
In this help file, we’ll cover the key configurations in the AMS module:
- Asset Type Creation
- Asset Master Creation
- Mapping Assets to Employees (Manual & Bulk)
- Asset Mailer / Letter Configuration
- Asset Report
Step 1: Asset Type Creation
Navigation: Settings → Asset Tab → Asset Type


- Under the Asset Type Master, click New and enter the following details:

- Master Title: Enter the name of the asset type.
- Ref. Text (optional): Add additional remarks or identifiers if needed.
- Classification Type: Choose whether the asset type is Recoverable or Non-Recoverable based on the nature of the item.
- Status: Set as Active or Inactive depending on its current use.
Asset Type Creation (In Bulk)
- If you would like to Create and Update Asset Types in Bulk --> Click on the Import icon --> Download Sample Template


- Fill the details in the Sample Template as shown below

- Save the template--> Select the file --> Click Import to create multiple asset types in bulk.

Step 2: Asset Masters Creation
- Click on Settings --> Under Asset Tab --> Click on Asset Master
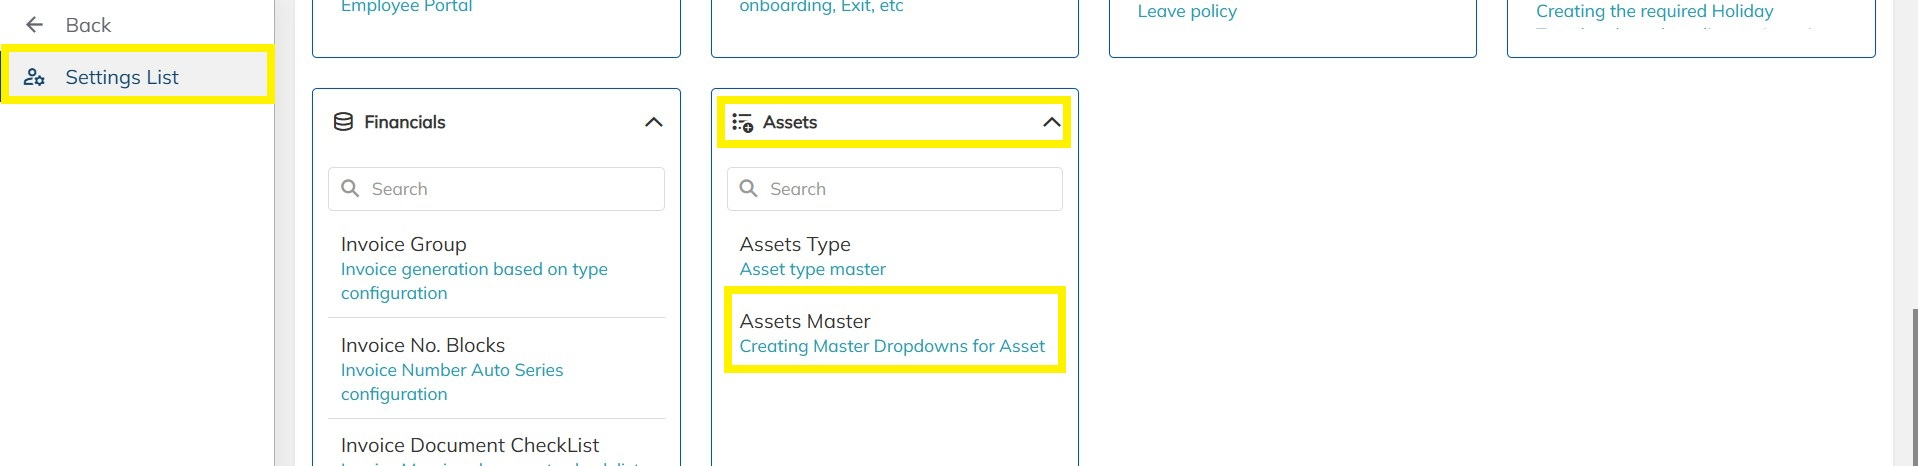

- Under the Assets Master ---> Click on New Asset and enter the below details:
- Asset Type: Here one can map the relevant asset type which was created
- Asset Tag: Here you can enter the Asset Tag (Asset ID)
- Brand (optional) : Enter the Brand details in case of Laptop and other devices assigned to the employees
- Model (optional) : Enter the brand model name based on the devices to be assigned to the employees.
- Serial Number (optional) : Enter the unique serial number for the respective devices to be assigned to the employees.
- Purchase Cost (optional) : Enter the original cost paid by the company at the time of purchasing the asset
- Current Cost (optional) : Enter the current or depreciated value of the asset as of today’s date.
- Purchase Date (optional) : Enter the date on which the asset was bought or acquired by the company.
- Warranty Expiry (optional) : Enter the last valid date of the manufacturer’s or vendor’s warranty for the asset.
- Vendor (optional) : Map the relevant Vendor name here.
- Notes (optional) : Enter any additional Notes can be mentioned here regarding the assets being created.
- Asset Status (optional) : Below are the various asset status descriptions to which the relevant asset status can be mapped
- Available: The asset is in stock and ready for allocation to any employee or department.
- Allocated : Asset has been assigned to an employee or department.
- Recover : Asset is being collected back from a user
- In Repair: Asset is under maintenance or service.
- Discard: Asset is no longer in use and has been scrapped.
- Status: The status can be updated as active and in active based on the asset master needs.
- Once all the details have been entered, click on save. Refer the sample

Step 3: Asset Masters Mapping to Employees (Bulk & Manually)
Mapping Asset to Employees (Manually):

- Once the asset master details have been created one can select the respective employee --> Click on Assets --> Map the asset master details and click on save.
Mapping Asset to Employees (Bulk)
- Step 1: Download the Template
- Go to Consultant → Import Icon → Consultant Detail Import
- Click on Update Consultant Details
- Download the Sample Excel Template

- Step 2: Fill in Asset Details
- Open the Excel template
- Enter the Asset details for each employee
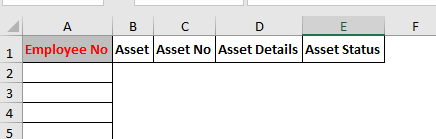
- Save the Excel file in your system
- Step 3: Upload and Validate
- Save the updated file
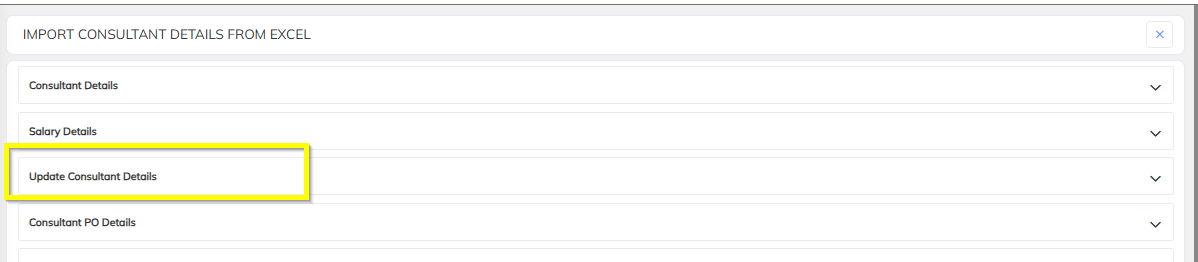
- Go to Import Consultant Details from Excel → Update Consultant Details


- Upload your file → Click Validate

- If validation is successful → Click Import

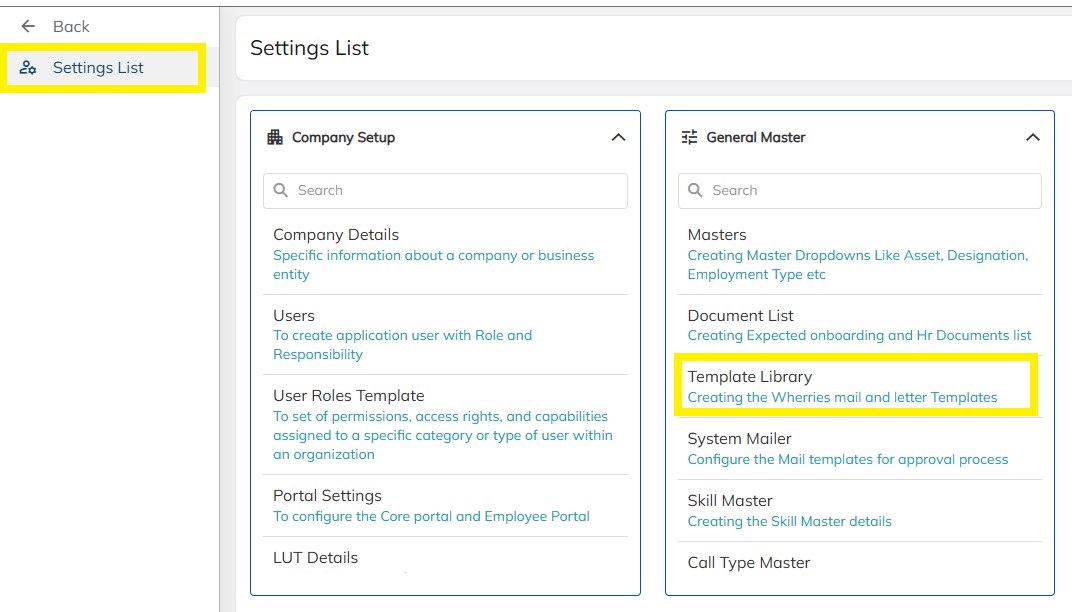
Step 4: Asset Letter Configuration and Generation
- Click on Settings--> Click on Template Library --> In the letter types--> Search for Asset Letter

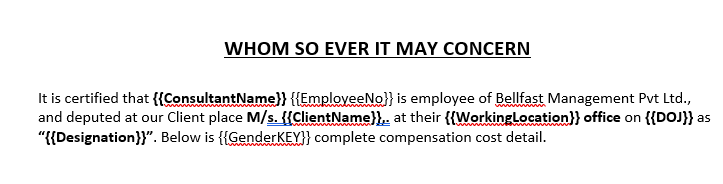
- Click on Add New and prepare the word Letter documents with replacing the data supporting TAGs as shown below and align the word document with standard formatting in order to get the proper alignment in the PDF copy.

- Use the TAGs , which replaced the employee details in the application during letter generation. Example : In the place of Employee name {{ConsultantName}}, {{Designation}} & {{DOJ}} etc. Refer the sample
- Tag list are available in the application in the View Support Tag option on the same letter configuration screen as shown above.
- Configured word documents need to upload in the application under choose file option and save the template.
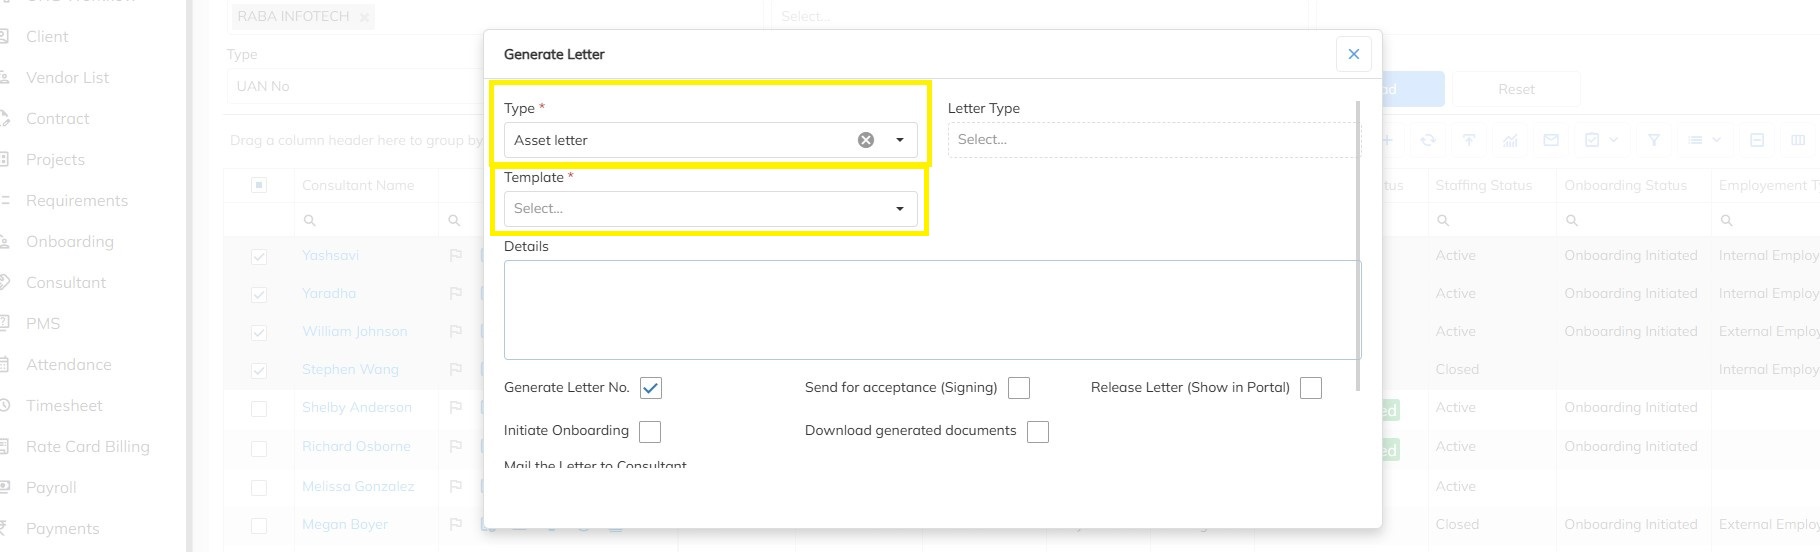
- Once the Asset letter is created --> Go to Employee module as shown below --> Filter out based on the employee --> Offer/HR Letter section --> Generate letter --> Select the letter type as Asset letter and Click on Generate Letter


- Once the letter is generated the user can view the generated letter under the Offer & HR Letter section as shown below:

- To generate in Bulk --> Click on Employee module and click on Filter--> Enter the employee codes/ name ---> Click on Load Employee List
 \
\
- Select the Employees --> Click on Generate Letter --> Select the letter type as Asset letter --> Click on Template--> Selected the respective asset letter --> Scroll down and Click on Generate

Step 5: Asset Reports
- Click on Reports --> Click on Consultant/Employee/Associate Reports


- Click on Employee Asset details and generate or you can apply relevant filters and generate as well as shown below

Need Help?
If you have any doubts or need further assistance regarding client creation or any other feature, feel free to reach out to our support team at support@staffinggo.in. We’re here to help you!
Was this article helpful?
That’s Great!
Thank you for your feedback
Sorry! We couldn't be helpful
Thank you for your feedback
Feedback sent
We appreciate your effort and will try to fix the article