Payroll – Zero-Day Payroll
1. Purpose
Zero-Day Payroll process is used to process payroll for employees who have 0 payable days during the payroll period but require payroll processing based on the applicable configuration and payroll rules.
2. When to Use Zero-Day Payroll
Zero-Day Payroll can be used when:
- Employee has 0 payable days for the payroll month.
- Employee has no attendance/payable days but needs to be included in payroll processing.
- Employee needs to be considered in payroll for reporting or statutory/process requirements, wherever applicable.
3. Prerequisites
Before processing Zero-Day Payroll, verify:
- Employee is active/mapped to the respective client.
- Employee has a valid salary structure.
- Payroll month and billing/payroll calendar are correctly configured.
- Employee's attendance/timesheet reflects 0 payable days, wherever applicable.
- Required statutory configurations such as PF, ESI, PT, LWF, etc., are correctly configured.
- There are no pending payroll transactions that may affect the payroll calculation.
4. Zero-Day Payroll – Manual Process
To process Zero-Day Payroll manually, follow the below navigation and steps.
Step 1: Navigate to Timesheet
Navigate to the Timesheet module.
Step 2: Select Client/Employee
Select the required Client and Employee ID with applicable payroll month

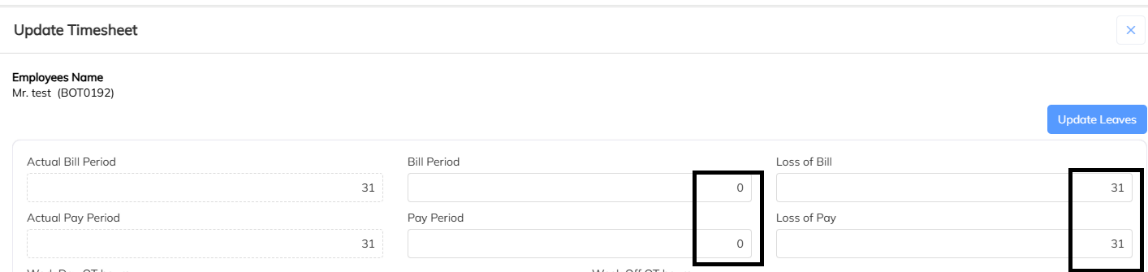
Step 3: Update Bill & Pay Period
In the employee's timesheet:
- Set the Bill & Pay Period to 0 days.
- Set the Loss of Bill & Pay Period to 31 days for a 31-day payroll month.
- For months having fewer than 31 days, update the Loss of Bill & Pay Period according to the applicable calendar days.
- Save the updated timesheet details.
Step 4: Run the Timesheet
After saving the changes, run/process the timesheet and proceed with payroll processing. Once the payroll is processed successfully, validate the employee's details in the Pay Register.
5. Zero-Day Payroll – Bulk Process
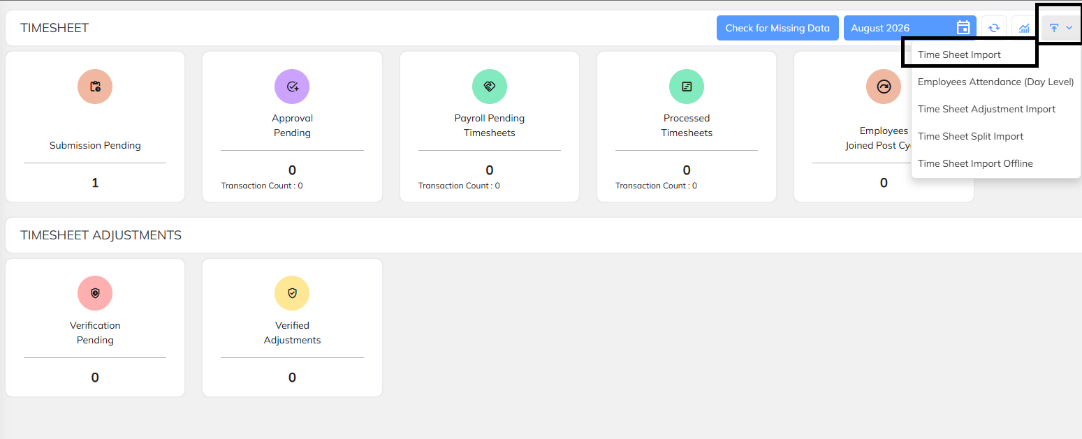
For processing Zero-Day Payroll for multiple employees, the Bulk Timesheet Upload option can be used.
Step 1: Navigate to Timesheet
Navigate to the Timesheet module.
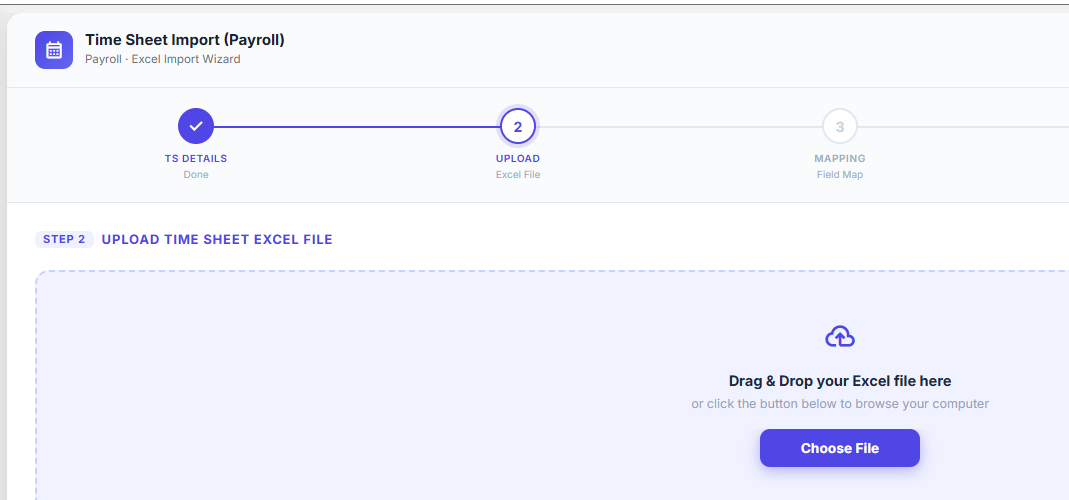
Click on Bulk Download Excel File to download the timesheet template.
Step 3: Update the Excel File
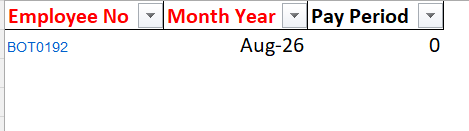
In the downloaded Excel file, update the following details:
- Applicable Month
- Applicable Year
- Employee Number/Employee ID
- Pay Period
For Zero-Day Payroll:
- Update the Pay Period/Payable Days as 0 days.
- Ensure the employee details are entered correctly.
- Verify the month and year before uploading the file.
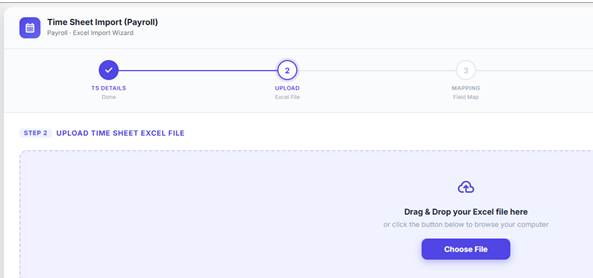
Step 4: Upload the Timesheet
After updating the Excel file:
- Save the Excel file.
- Navigate back to the Timesheet module.
- Upload the updated timesheet file.
- Validate the uploaded records.
Step 6: Process Payroll
After the timesheet is successfully processed, proceed with the payroll processing for the applicable month.
Step 7: Validate Pay Register
After payroll processing, verify the Pay Register and confirm that:
- Employee is available in the Pay Register.
- Payable Days are reflected as 0.
Note: Important Points
- Ensure the correct Payroll Month and Year are selected before processing.
- Before updating payable days, verify the employee's timesheet details.
- For manual processing, ensure the Bill & Pay Period is 0 days and the Loss of Bill & Pay Period is updated according to the applicable calendar days.
- For bulk processing, ensure the Excel file follows the prescribed format.
- Do not upload duplicate timesheet records for the same employee and payroll month.
- Always validate the Pay Register after payroll processing.
Was this article helpful?
That’s Great!
Thank you for your feedback
Sorry! We couldn't be helpful
Thank you for your feedback
Feedback sent
We appreciate your effort and will try to fix the article